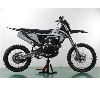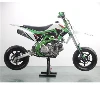
If you’ve ever fired up a pit bike only to be greeted by a cloud of thick black exhaust, a sputtering engine that won’t idle, or a gas puddle under your ride, chances are you’re dealing with a flooded carburetor. As a pit bike and dirt bike supplier, I’ve seen this problem pop up more times than I can count—especially on entry-level models like the Kids 49CC DIRT BIKE BRAND BENLIE MODEL NAME S-CROSS that many new young riders (and their parents) pick up for weekend trail riding. Carb flooding isn’t just a frustrating hiccup; it can damage spark plugs, wash down engine lubricant, and even cause safety hazards if your bike surges unexpectedly mid-ride. The good news is, most of the time, it’s a fix you can do at home with basic tools, no need to tow your bike to a mechanic.
First, let’s break down why a carburetor floods in the first place. Carburetors work by mixing air and fuel in the right ratio to feed the engine. When something goes wrong with the float chamber—the part that holds the fuel before it mixes with air—fuel keeps flowing into the chamber even when it’s full, leaking into the intake manifold and cylinders. Common culprits include a stuck float valve (the small needle that seals the fuel inlet when the chamber is full), a misadjusted float level, clogged jets that cause uneven fuel flow, or even a damaged gasket that lets excess fuel seep through. For the Kids Mini Moto Cross Pit Dirt Bike 49cc we sell, which is built for younger riders who might run their bikes low on gas or ride through dusty terrain, the most frequent issue is a dirty or sticky float valve. Dust and small debris can get stuck in the valve, preventing it from sealing properly and letting fuel keep pouring in.
Before you dive in, safety is non-negotiable. Gasoline is highly flammable, so always work in a well-ventilated area away from open flames, sparks, or heat sources like grills or space heaters. Disconnect the spark plug wire first to make sure the engine can’t accidentally turn over while you’re working—this is a simple step that prevents serious injury. Also, have a rag or a small pan handy to catch any fuel that leaks out; spilled gas is not only a fire risk but also bad for the environment, so never let it pool on your garage floor.
Now, let’s walk through the step-by-step fix, tailored to most pit bike carburetors, including the ones on our 49cc Mini Pit Bike for Kids, the Four Stroke 125cc Dirt Bike 110cc Air Cooled Pit Bike, and even larger models like our 300cc Liquid Cooled Four Stroke Dirt Bike Motocross Pit Bike—the core mechanics of carb flooding are the same across most pit bike sizes.
Step 1: Remove the carburetor from the bike (or at least the float chamber cover)
You don’t always need to take the entire carb off, but removing the float chamber cover will give you clear access to the parts that cause flooding. First, drain the existing fuel from the carb: locate the drain screw at the bottom of the float chamber, turn it counterclockwise, and let the old gas flow into your pan. Once it’s drained, use a screwdriver to remove the bolts holding the float chamber cover in place. Be gentle here—these bolts are small, and it’s easy to strip them if you over-tighten or use too much force. If your cover is stuck, a light tap with a rubber mallet will usually loosen it without damaging the carb.
Step 2: Inspect and clean the float valve and needle
The float valve (also called the inlet needle) is the most common cause of flooding. You’ll see it right where the fuel line connects to the carb, sitting against the brass or plastic seat that seals it. If there’s dirt, gummed-up fuel residue, or even a bent edge on the needle, it won’t seal properly. Pull the needle out gently, wiping it with a clean rag to remove any gunk. If there’s debris stuck in the seat, use a small wire brush or even a folded piece of cardboard to gently scrape it out—never use a metal tool that could scratch the seat, as scratches will cause leaks long-term. For minor dirt buildup, carb cleaner spray works great: spray the valve, needle, and seat thoroughly, then let it sit for a minute before wiping it clean. If the needle looks bent or worn, it’s a cheap, easy part to replace—don’t try to bend it back into shape, as that will ruin the seal.
Step 3: Check the float and adjust the float level
Next, look at the float itself. It’s a small, lightweight piece (usually metal or plastic) connected to the needle, moving up and down with the fuel level in the chamber. If the float is damaged, punctured, or has fuel inside it, it will sit lower than it should, causing the needle to stay open too long and flood the chamber. For plastic floats, a puncture is easy to spot—submerge it in a cup of hot water, and if bubbles come out, it’s leaking. Damaged floats need to be replaced. If the float is in good shape but the level is off, you can adjust it. On most small pit bike carbs, the float has a small tab where it connects to the needle. Gently bend this tab up or down to set the level: with the chamber cover off and the bike held upright, the fuel should sit 1–2 millimeters below the top of the chamber (or follow your model’s specific specs, which we list in the owner’s manual for all our bikes). Bend the tab just a little at a time, test it, and repeat until the level is correct. Too high, and fuel will overflow; too low, and the engine will run lean.
Step 4: Clean the jets and passages
Clogged main jets or idle jets can also cause flooding—if fuel can’t flow properly through these small holes, the pressure builds up and forces extra fuel into the chamber. Use a small pick or a piece of copper wire (never a metal drill bit, which can widen the hole) to gently clear out any debris from the jets. Then, spray carb cleaner through all the passages in the carb body, including the air bleed holes, to make sure there’s no leftover gum. If your jets are severely clogged, you can soak them in carb cleaner overnight for a deeper clean.
Step 5: Reassemble and test for leaks
Once everything is clean and adjusted, put the float chamber cover back on, tightening the bolts evenly (don’t crank them down too hard—this can crack the plastic cover). Reconnect the spark plug wire, and add fresh gasoline to your tank (old gas with ethanol can cause gunk buildup, so fresh fuel is key). Turn the fuel valve on, and watch for leaks: if fuel is dripping from the carb’s inlet, your float valve isn’t sealing correctly, and you’ll need to go back and check the needle or adjust the float level. If there are no leaks, try starting the bike. If it still runs rough or smokes, you might need to adjust the idle screw or check the spark plug—flooding can foul the plug, so remove it, clean the electrode with sandpaper, and gap it to the manufacturer’s specs before reinstalling.
As a supplier, I always tell pit bike owners that regular maintenance is the best way to prevent carb flooding. For our kids’ models, which are often ridden by new owners who might not check their bikes as often, a quick carb clean every 20–30 hours of riding (or at the start of each riding season) goes a long way. Avoid leaving gas in the tank for more than a month if you’re not riding—ethanol in modern gas breaks down quickly, creating gum that clogs carb parts. And if you’re not comfortable doing the fix yourself, our team can help with parts or troubleshooting, whether you own a 49cc mini pit bike or a 300cc motocross model.
If you’re in the market for a reliable pit bike that’s built to stand up to regular use, we have a range of models to fit every rider. For young beginners, the Kids 49CC DIRT BIKE BRAND BENLIE MODEL NAME S-CROSS is a great choice, with a simple carburetor that’s easy to maintain. For older kids or teens ready for a bit more power, the Kids Mini Moto Cross Pit Dirt Bike 49cc and 49cc Mini Pit Bike for Kids offer smooth power and durable components. For adult riders or those looking for trail or motocross performance, our Four Stroke 125cc Dirt Bike 110cc Air Cooled Pit Bike and 300cc Liquid Cooled Four Stroke Dirt Bike Motocross Pit Bike feature advanced carburetor designs that are less prone to flooding, though proper maintenance is still key.


If you have questions about carb issues, need replacement parts, or want to learn more about our pit bike lineup, we’re here to help. Whether you’re a first-time rider or a seasoned enthusiast, we provide support to keep your bike running smoothly, so you can focus on enjoying the trails without dealing with a flooded carb.
References
- Small Engine Repair: Carburetor Troubleshooting Guide. Small Engine Trade Association, 2022.
- Pit Bike Maintenance Manual: Model-Specific Carb Care. Off-Road Industry Association, 2023.
- Ethanol Fuel Effects on Small Engine Carburetors. American Petroleum Institute, 2021.
- Youth Dirt Bike Safety and Maintenance Best Practices. Consumer Product Safety Commission, 2022.