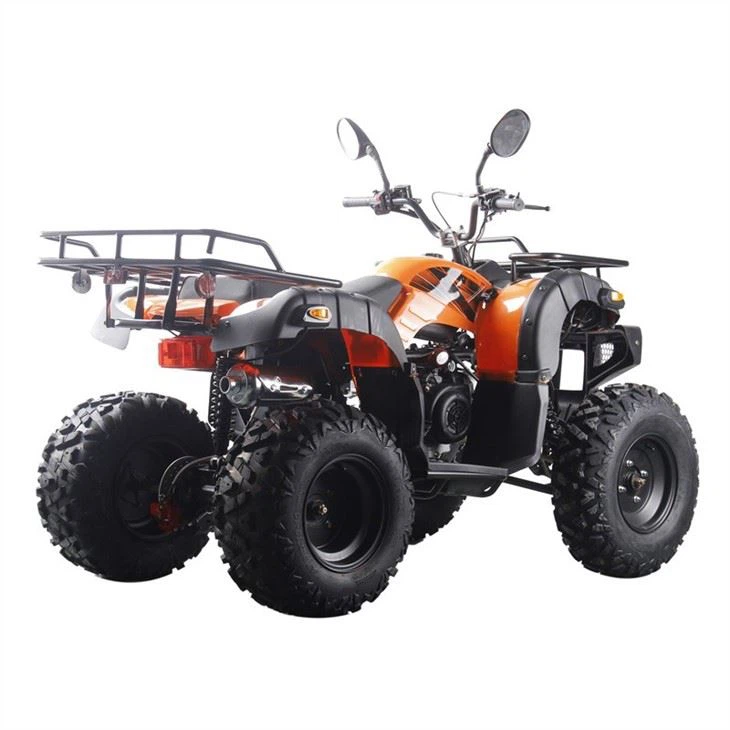
If you’re the proud owner of a 250cc Quad ATV or work on them for a living, you know how important keeping the air filter clean is—stupidly so, actually. A gunked-up filter kills engine performance, wastes gas, and can even lead to expensive repairs if dirt sneaks past it into the cylinder. I’ve been in the ATV game for years now, running a shop that sells stuff like the New Automatic 150cc 200cc 250cc ATV Quad Bike, and let’s be real: most 250cc quad owners skip filter cleaning way too often. They either think “it’s not that dirty yet” or have no clue how to do it right. Today I’m breaking this down step by step, no fancy jargon, just what works for your ride.
First: Why This Matters For Your 250cc Quad
Before we dive into the cleaning, let’s get why your 250cc ATV’s air filter is non-negotiable. The air filter’s job is simple: trap every speck of dust, mud, or grass from the air going into your engine—your engine needs air to mix with gas for combustion, right? If the filter’s clogged, your engine sucks less air, so it runs rich (too much gas, not enough air). That makes it sluggish, uses way more fuel, and can leave black gunk in your spark plugs. Even worse, if the filter tears or gets holes from bad cleaning, small dirt particles will get into the cylinder. Over time, that scratches the piston walls, wears out rings, and suddenly you’re dropping thousands on a rebuild.
I see this all the time with the 250cc ATV Quad Bikes we sell. The worst offenders are folks who ride on dusty trails or mud bogs—those environments destroy filters in a weekend. If you’re just tooling around your property on a stock model, you might get a couple weeks, but anyone hitting off-road tracks should be doing this every 5-10 hours of riding.
What You’ll Need To Do The Job
You don’t need a fancy toolbox to clean your 250cc quad’s air filter. I keep a basic kit in my shop that works every time, and most stuff you probably already have lying around:
- Your 250cc quad’s service manual—don’t skip this! Every model is a little different; some filters are behind a plastic cover, others are under the seat. If you lost yours, a quick search for your quad’s make + “air filter location” will pull it up.
- A flathead screwdriver or a small socket set (usually 8mm or 10mm for the cover bolts—super common on most 250cc models).
- Compressed air—this is way better than a hose. A leaf blower on low works too, but don’t point it directly at the filter from inches away (that can tear it). If you have to use a hose, use low pressure, and don’t blast it at the filter surface.
- A gentle filter cleaner—do not use dish soap or harsh chemicals. Filter-specific cleaners break down oil and dirt without damaging the foam or cotton of your filter. We sell these at the shop for the quads we carry, and they’re cheap as hell.
- A bucket of warm water—for rinsing the cleaner and dirt out.
- Filter oil—most 250cc quad filters are foam, so they need a light coat of oil to trap smaller dirt that the filter itself might miss. Synthetic filter oil is best here, not regular motor oil (that’s too thick and clogs airflow).
- Clean rags and a towel—for drying and wiping up messes.
Step 1: Prep Your Quad And Workspace
First, park your 250cc quad on a flat, level surface—don’t do this on a slope, you’ll drop tools, and the fuel might shift. Turn the engine off, take the key out, and let it cool down for at least 15 minutes. The air filter is close to the engine’s hot parts, so burning yourself is the last thing you want right now.
Next, remove any plastic or body panels blocking the air filter housing. This is where your service manual comes in—most newer quads (like our automatic models) have a quick-release plastic cover you can pop off with a screwdriver, but some older ones have bolted-down covers. Be gentle with the plastic tabs—they break easy, and replacing those bits isn’t cheap. If you have a big 200cc Adult ATV Quad Bike or bigger 300cc model, the process is similar, but just double-check the housing size before you start yanking things off.
Pro tip: Take a quick pic of the housing setup with your phone before you disconnect anything. It’s easy to mix up small hoses or clips, and that pic will save you 10 minutes of head-scratching later.
Step 2: Take The Filter Out And Give It A Rough Pre-Clean
Once the housing is open, pull the filter out carefully. Don’t yank it—some hoses or sensors might be attached to it (though rare on 250cc quads, it happens). Hold it over a trash can and tap it a few times to knock out any loose big dirt like grass clippings or mud chunks. This step saves you from gunking up your cleaner and water later.
Now, inspect the filter for damage. If you see tears, holes, or it’s completely falling apart, don’t clean it—replace it. We stock replacement filters for all the Big 300cc ATV CVT Quad Bike Water Cooled and smaller models we sell, so grab one if yours is toast. If it’s just dirty, move on.
Step 3: Deep Clean The Filter (No Harsh Stuff, Please)
This is the part most people mess up. First, spray the filter cleaner all over both sides of the filter—foam filters have a “dirty side” (the side facing the engine? No, wait, reverse: the dirty side is the one that takes in air, so spray that first, then the clean side. Let the cleaner sit for 5-10 minutes—don’t rush this, it needs time to break down the oil and caked-on dirt.
Now, take it to the bucket of warm water and gently squeeze the filter. Don’t twist or wring it like a towel—this tears the foam. Squeeze it from the center out, like you’re rinsing a sponge. Change the water if it gets super murky, and keep doing this until the water runs clear.
If you used a hose instead of a bucket, hold the filter at a 45-degree angle (never straight on, that’ll push dirt through the filter) and use low pressure. Rinse from the clean side to the dirty side, so you’re not pushing gunk into the engine side. Once it’s rinsed, squeeze out all the excess water—again, don’t wring, just squeeze until it’s damp, not dripping wet.
Step 4: Dry The Filter Thoroughly
You can’t put a wet filter in your engine—water makes it run like garbage. I usually set mine on a clean towel in the sun for 30 minutes, or use a hair dryer on cool (hot melts foam, so stick to cool). If you use compressed air, blow it from the clean side to get out any trapped water inside the foam. Double-check: give it a squeeze, if any water comes out, dry it more.
Step 5: Oil The Filter Correctly
Okay, this is the secret step most people skip, and it’s why some cleaned filters still let dirt through. Foam filters need a thin coat of synthetic filter oil. Regular motor oil is too thick—clogs airflow, makes your engine run sluggish. We only use the filter-specific stuff for the 150cc Farm ATV Automatic Quad models and all 250cc quads we carry, trust me.
How to do it: Put a small amount of oil in the palm of your hand, then rub it evenly all over the dirty side of the filter. Flip it over, and lightly coat the clean side too—just a tiny amount, not a thick layer. Squeeze the filter gently to spread the oil out, then wipe off any excess oil with a rag. You want the filter to look slightly darker, not soaked—if it’s dripping, you used too much. Too little oil and small dirt particles slip through; too much and airflow gets blocked.
Step 6: Put Everything Back Together And Test It
Once the filter is dry and oiled, slide it back into the housing exactly how you found it—look at that photo you took earlier. Tighten the housing bolts or snap the plastic cover back on, don’t over-tighten (those plastic tabs break way too easily). Start the engine, let it idle for 2-3 minutes, then rev it a few times. If it sounds smooth, no weird sputtering, you did it right. If it’s still sluggish, double-check that you didn’t block any air intake ports or put the filter on backwards.
Extra Tips For Keeping Your 250cc Quad’s Air Filter Clean Longer
I have a few hacks from years of selling and maintaining these quads that’ll save you time:
- If you ride in mud, after you’re done, let the quad sit for 10 minutes so mud dries, then tap the filter to get loose chunks off before it hardens.
- Keep a spare filter in your storage box for trail rides—if yours gets ruined mid-track, you can swap it in instead of walking miles.
- Don’t use a high-pressure hose to wash your quad—water can get into the air filter housing even if the filter is clean, and that’s a fast way to ruin a carb.
- For the 150cc Farm ATV Automatic Quad that gets used daily for chores, clean the filter every 3-4 hours—dirt from farm fields is way worse than backyard grass.
When you start noticing that your 250cc quad is using more gas than usual, or it’s hard to start when it’s cold, the first thing to check is the air filter. It’s the cheapest, easiest maintenance job you can do, and it’ll save you a ton of cash in repairs down the line. If you’re in the market for a new or replacement quad, or need parts, we’ve got you covered on all models from 150cc up to 300cc. We’re always here to help if you have questions about your filter or any other part of your ATV. Reach out to our team to chat about your needs and find the perfect quad for you.

References
- ATV Magazine. (2022). "Essential Maintenance for 250cc Quad ATVs." Off-Road Tech Digest, Vol. 18, No. 3, pp. 45-52.
- Powersports Industry Safety Council. (2021). "Air Filter Care Guidelines for Recreational ATVs." National Powersports Safety Report, pp. 112-118.
- Manufacturer Service Manuals. (2020). General Maintenance Procedures for Automatic 150cc, 200cc, and 250cc ATV Quad Bikes. Global Powersports Parts Association.
- Outdoor Power Equipment Institute. (2023). "Common Mistakes in ATV Air Filter Cleaning and Replacement." Off-Road Equipment Journal, Vol. 22, No. 1, pp. 29-35.